How to Enable SSL in Squarespace
In today's digital world, website security has become a top priority for every website. One of the most important security measures you can take is to enable SSL on your website.
In this post, we'll explain what SSL is, how to enable SSL in Squarespace, and how to check SSL status in Squarespace.
What is SSL?
SSL stands for Secure Sockets Layer, which is a security protocol that encrypts data transmitted between a web server and a web browser. When SSL is enabled on a website, any data that is transmitted between the website and the user's browser is encrypted and therefore it is secure from hackers and other malicious actors.
How to Enable SSL in Squarespace
Enabling SSL in Squarespace is a simple process that can be done in just a few steps. Here's how:
Step 1: Log in to your Squarespace account.
Step 2: From the dashboard, click on Settings.

Step 3: Expand the Developer Tools drop-down, and then click on SSL.
Step 4: Enable the Secure and the HSTS Secure options.

That's it! SSL is now enabled on your Squarespace website.
How to Check SSL Status in Squarespace
To check the SSL status of your Squarespace website, follow these steps:
Step 1: Log in to your Squarespace account.
Step 2: From the dashboard, click on Settings.
Step 3: Expand the Developer Tools drop-down, and then click on SSL.
Step 4: Look for the "Certificate Status". If SSL is enabled, it will say "Active."
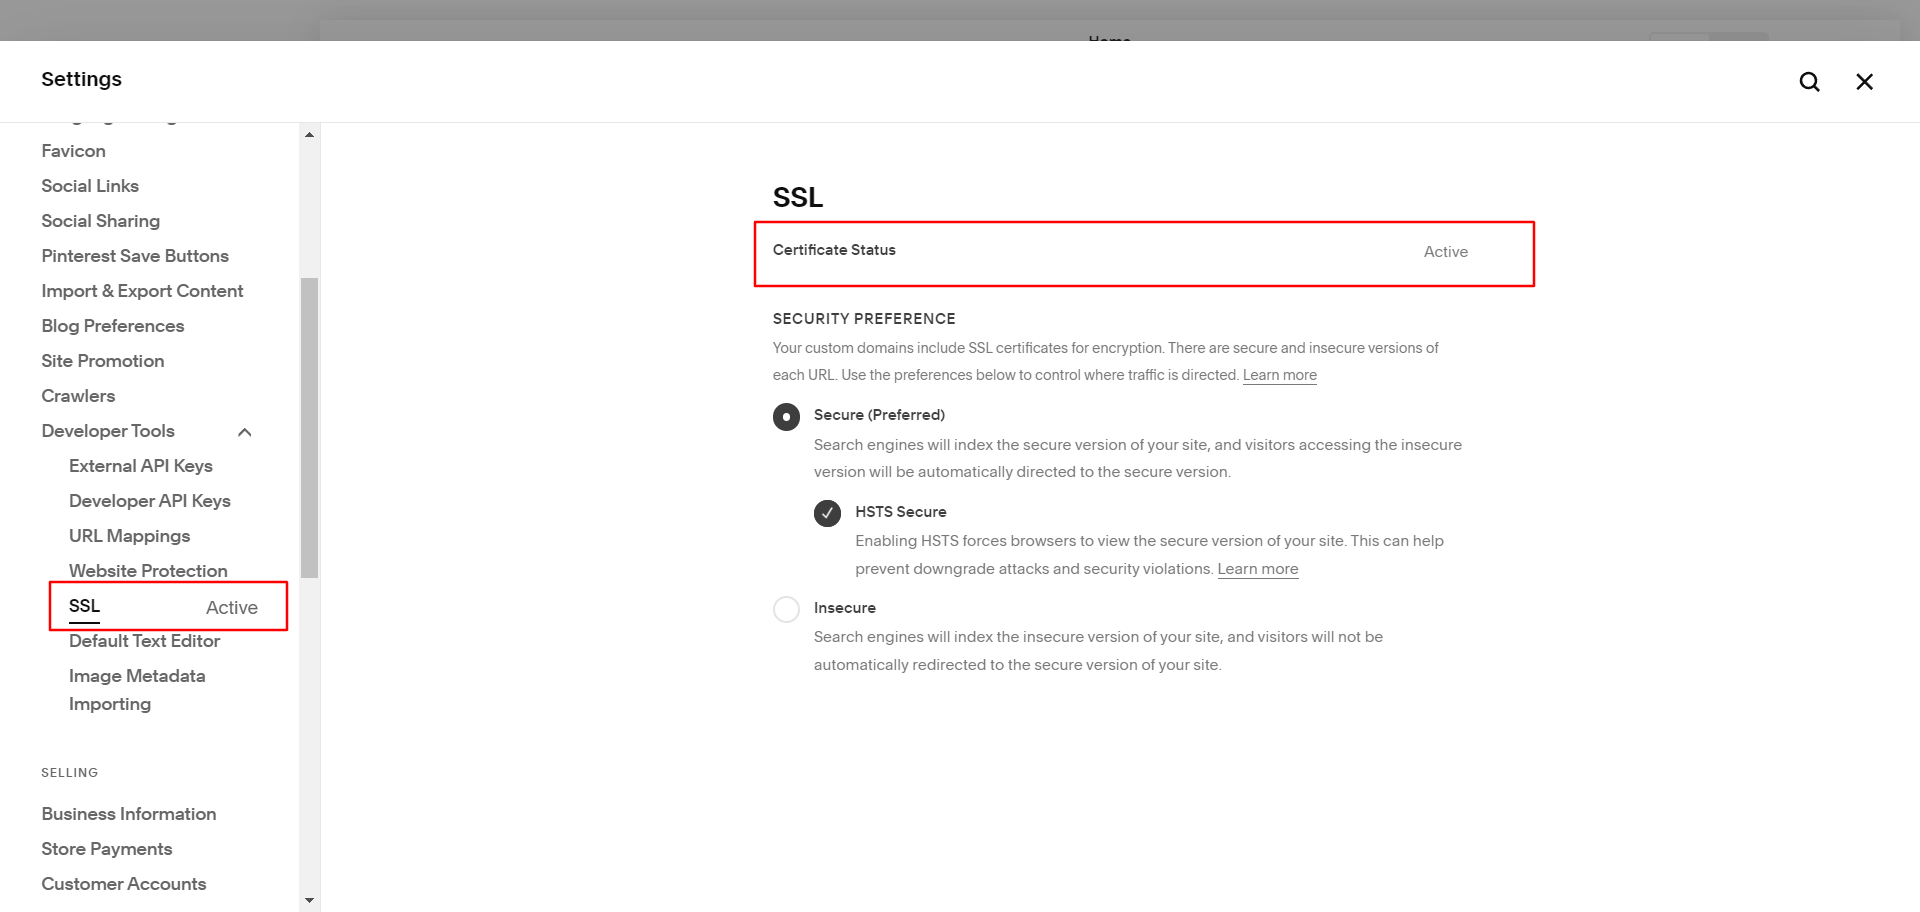
If SSL is not enabled, it will say "Inactive." If SSL is inactive, make sure to toggle the SSL switch to the on position to enable SSL on your Squarespace website.
In conclusion, enabling SSL on your Squarespace website is an important step in ensuring the security of your website and protecting your users' data.
By following the steps outlined in this post, you can easily enable SSL on your Squarespace website and check the SSL status to ensure that your website is secure.